As of now (November 19, 2024), displays for Speeduino are not yet in production, but here’s how to connect them to Speeduino ECUs that do not have dedicated connectors for them.
- Hardware
First, power supply and communication. You’ll need a common 4-pin NS25 connector and a matching plug, which might be useful. Solder four wires to the connector as follows:
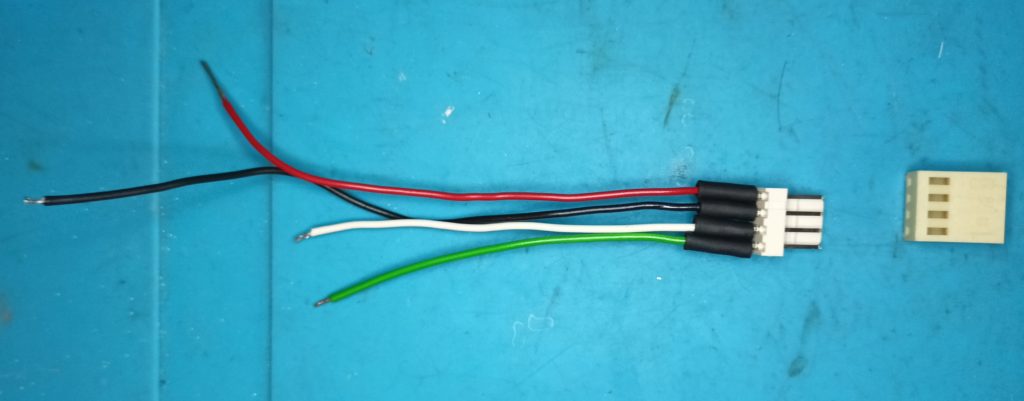
red: +5V supply
black: ground GND
white: serial3 RXD
green: serial3 TXD
Next, solder these wires to the underside of the PCB (refer to the Arduino Mega2560 documentation!) to the points where Serial3 TXD, Serial3 RXD, GND, and VCC 5V are exposed.
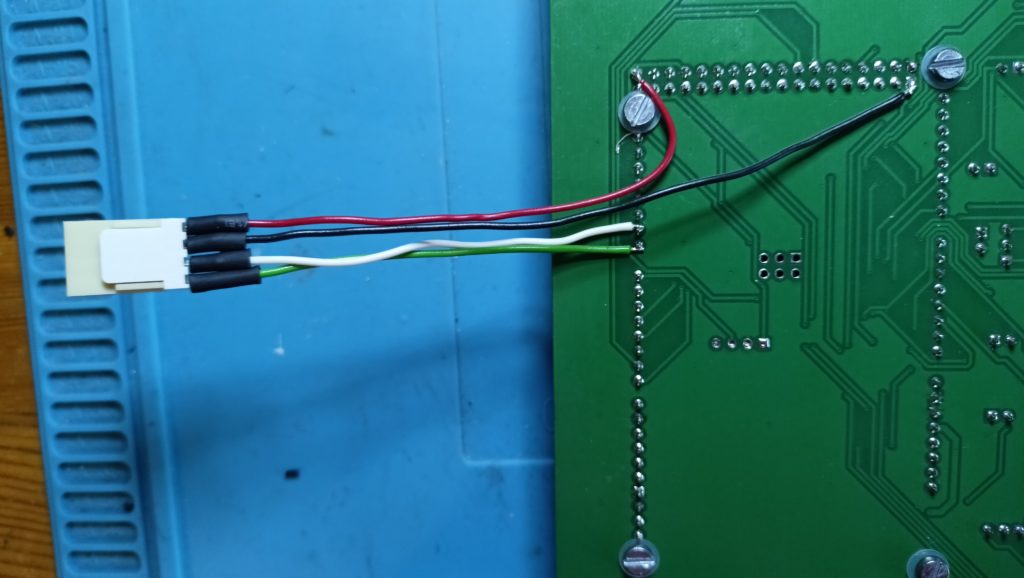
(If the display is not connected, it is recommended to insert an empty plug into the socket to avoid a short circuit, which could lead to unexpected engine shutdowns for instance)
If you plan to connect oil pressure and temperature sensors, you will need to add pull-up resistors to the inputs used for their measurement. In my ECUs, these are: A10: oil pressure, A11: oil temperature
Oil temperature measurement is typically done using NTC thermistors. If you are using the Bosch PST-F1 0 261 230 482 2-in-1 sensor, use a 1kΩ resistor. For other sensors, the pull-up resistor should have a resistance 2.5 times lower than the thermistor's resistance at 20°C. Note that accuracy is not guaranteed in this case.
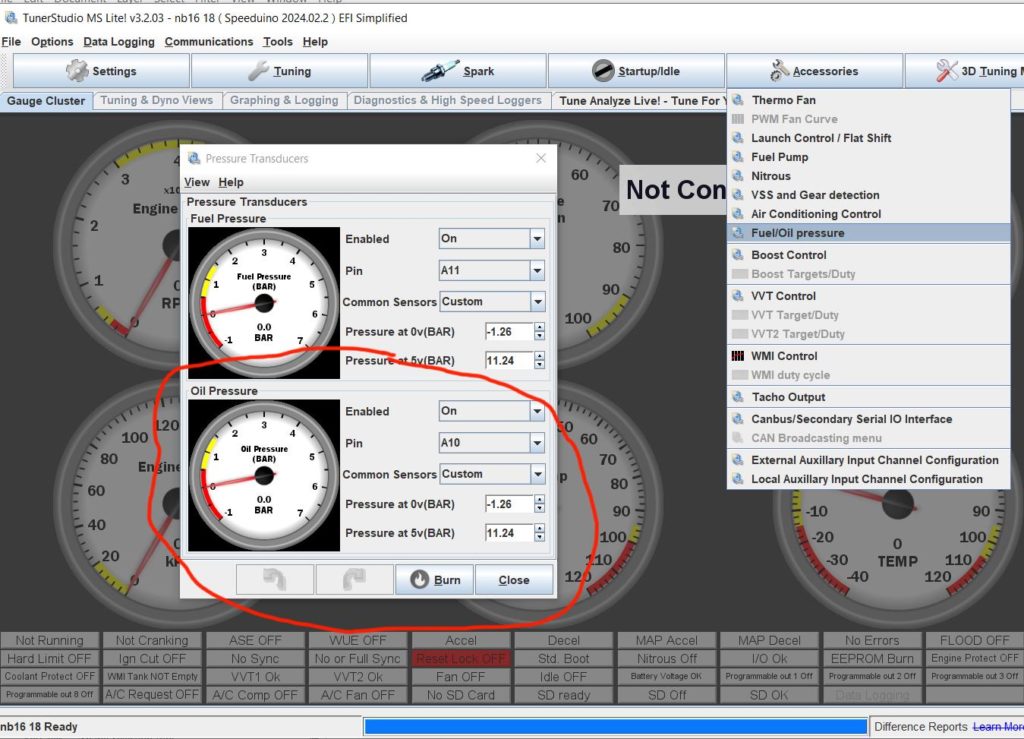
Oil pressure measurement. If using the Bosch sensor mentioned above, no pull-up resistor is required, as this sensor provides a voltage signal.
If using another sensor, e.g., a stock pressure switch where the signal is simply a ground-connected contact, you will need to add a pull-up resistor. The resistance of this resistor is not critical—it can be anything between 1kΩ and 10kΩ, or even higher.
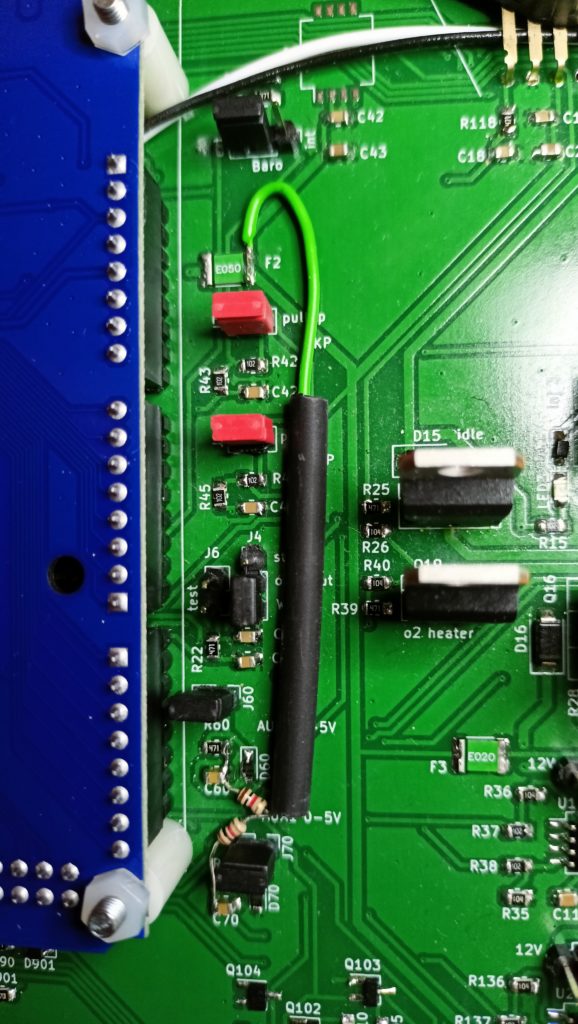
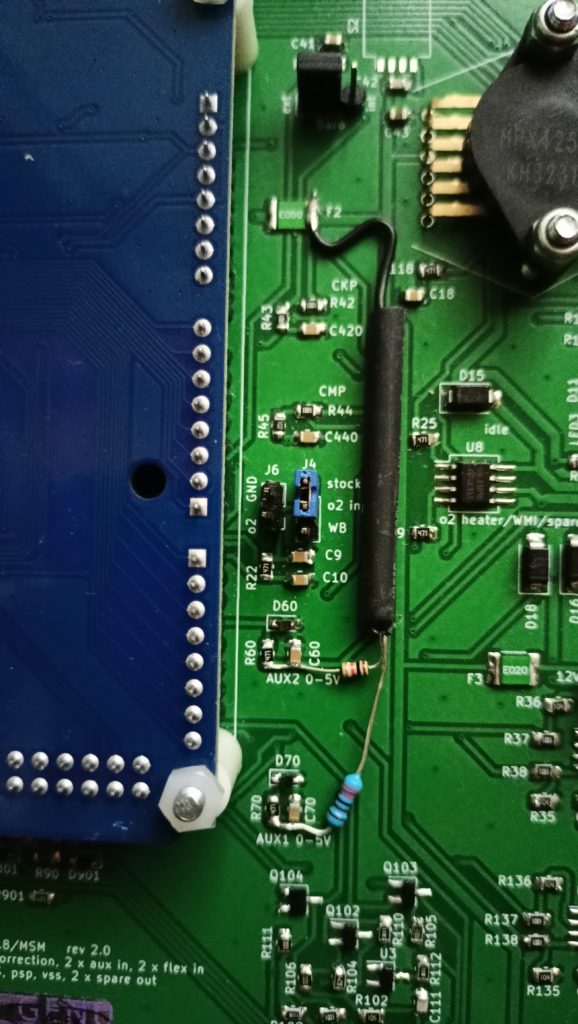
pullup in Speeduino PnP Mazda MX-5 NBFL v2
Pull-up resistors can also be added externally, e.g., on the ECU terminals inside ECU. Always refer to the documentation and proceed with caution.
Finally, attach a heatsink to the 12V → 5V linear voltage regulator. The display draws about 100mA, causing approximately 0.8W of additional power dissipation. Adding a heatsink will help reduce overheating.

With the hardware setup complete, move on to:
2. Software setup
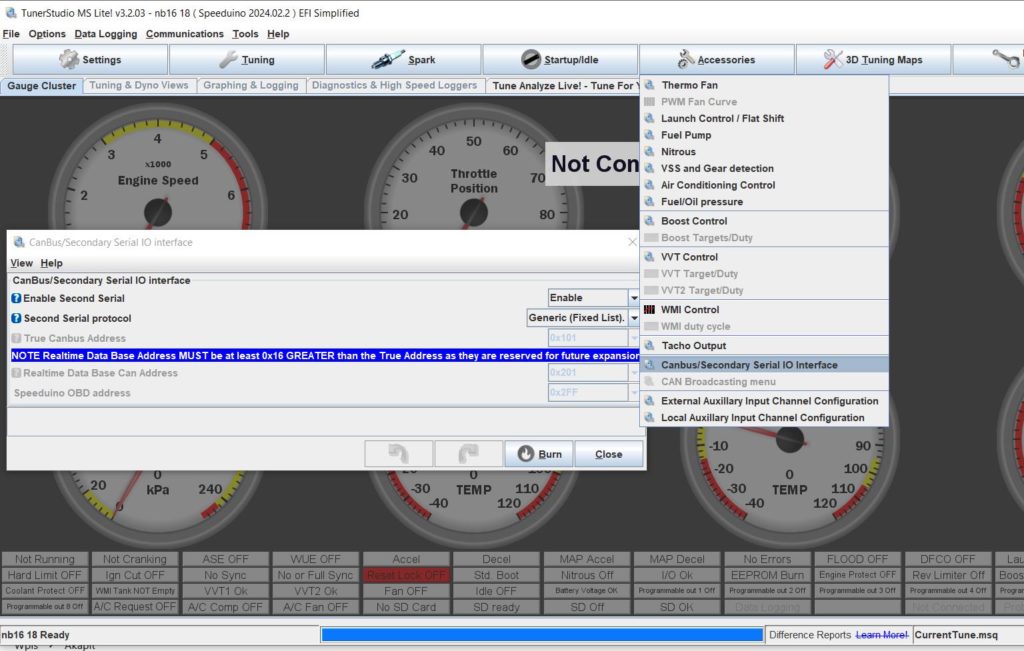
In your TunerStudio project, under Accessories → Canbus/Secondary Serial IO Interface, configure the settings as shown below.
Then calibrate the oil pressure sensor
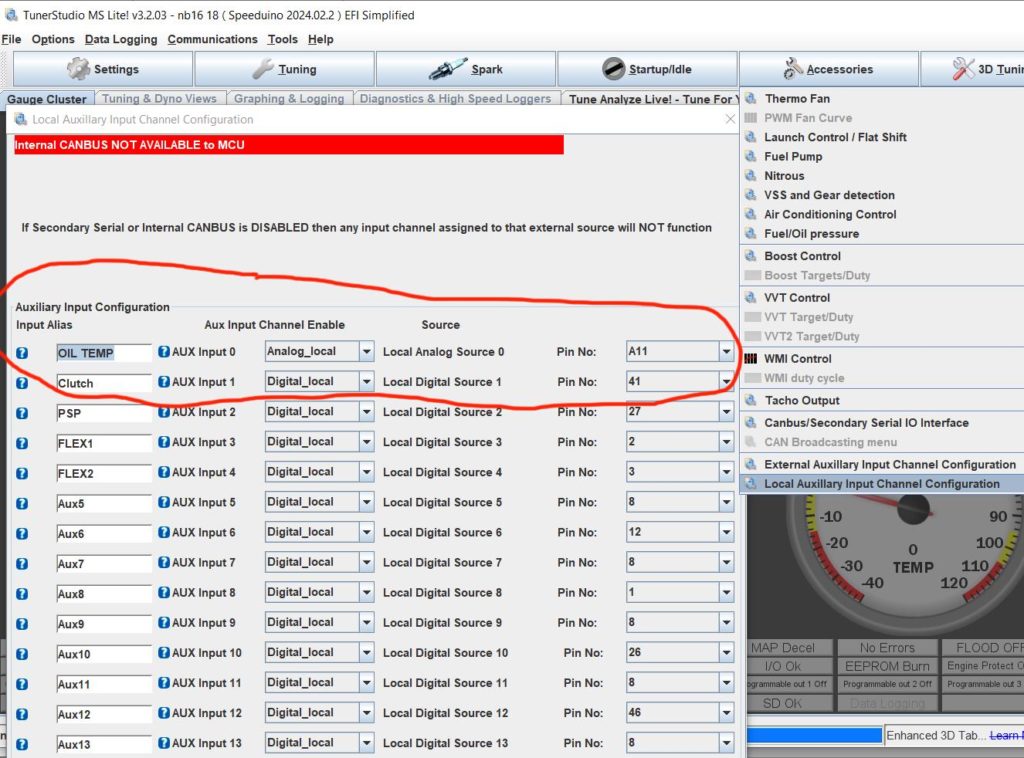
and the oil temperature sensor on Aux 0. Speeduino does not natively support oil temperature sensors. The display reads the voltage on Aux 0 and calculates the value based on a programmed curve.
And that's it!